
2020. 9. 14. 18:53ㆍRaspberry Pi
The Raspberry Pi series: The Setup
Hello, Babae is back!
Last week, I started off the series by introducing the Raspberry Pi and Pi-hole. I realized that I may have jumped the gun as I have received a lot of readers' questions on how to set up the Pi.

This week, I am going to start from the very basic. I will walk you through how I set up the Pi and give you may be the tibits you need to troubleshoot your own setup. Now, I intend to use the Pi as a server so this means that I don't have to run the Pi with a screen, mouse, or keyboard (otherwise known as headless). I do this for a few reasons:
- Running a graphical user interface (GUI) will take from the limit resources, such as processor and memory. Without a GUI, the Pi can focus on the actual tasks - all except one does not need a screen. The exception is Kodi and even then, you do not need a desktop environment to run it. We will talk about Kodi in a later series.
- The Pi is a perfect home server. It has a very low energy consumption, which means you don't need to spend a lot to run it 24/7, and it is silent. You can opt for a small fan but even without, it does not reach temperatures that would trigger thermal throttling, which is when the CPU slows itself down to protect itself from overheating.
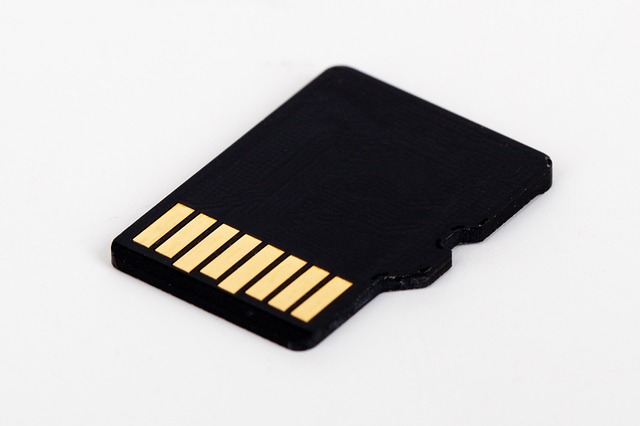
- The software I run on the Pi requires little to no input from me after the install so why waste time, and/or money plugging in a screen, mouse, and keyboard? If I need to configure something on the Pi, it is easier to just SSH into it (I will explain SSH later in this post). And again, we will talk more about the software I run on the Pi in later parts of the series. What I intend to teach in this series require only one investment, the Pi itself, assuming you have access to Wi-Fi, a microUSB or Type-C cable (depending on the version of your Pi - the Pi 4 uses Type-C, while all previous generations use microUSB), and a microSD card.
In other tutorials, they may ask you to download the read-only memory (ROM) image and then flash the image on the microSD card but the easiest way to get started is with the Raspberry Pi Imager.
After you have downloaded and installed the Raspberry Pi Imager, open it. Click the button to choose operating system. You will now see a selection of ROMs and utilities. Choose Raspberry Pi OS (other), then Raspberry Pi OS Lite (32-bit). The Lite version of the OS has no desktop and bloatware. It is faster on start up and saves memory. Do not choose another operating system if you intend to follow me through this series. Also, as there are many software built or ported specifically for the Raspberry Pi, many of these software are intended for the Raspberry Pi OS (you will also see it referred to as Raspbian, as the name was changed earlier this year).
Next, insert your microSD card into your computer if you haven't already, and then click the button to choose your microSD card. This will format your microSD card so make sure it is one you don't need or move the contents elsewhere.
Finally, click on write.
When the writing is complete, eject your microSD card and put it back into your computer. You need to do two more things before you put it in the Pi and start it up. This is important as the Pi will automatically take the files on first boot to generate and configure its settings. If you do not complete the following steps properly, you will not be able to access the Pi remotely.
First, you need to enable Secure Shell (SSH), which is how you will access your Pi with your computer's screen, mouse, and keyboard. To do this, open your file explorer and go to boot partition on your microSD card.
On Linux, open a terminal window. For those who hasn't used the terminal before, by default, your terminal will open in the home directory. You can see that as the line starts with "yourusername@yourhostname:~$". The ~ is called tilde and it signifies the home directory. The $ means that the terminal is ready for your input. Change directory to the boot parition on the microSD card. If you don't know how to do that, you can google as this tutorial will be too long if I teach Linux as well. But for now, enter this command:
touch ssh
Touch is a command to create a file, and the second word, which is called argument, is the name of the file to create. So if you have not changed directory first, then open your file explorer, and you will find the ssh file without any extension on your home folder. Move the file into the boot partition.
In Windows, open the notepad application and goto file, save as, and type, with the quotes, "ssh", then save it to the boot partition. This will save the file with the name ssh without an extension.
Second, you need to set up your wireless access point. You may skip this step if you are connecting through ethernet.
On Linux, open a terminal and enter this command:
nano wpa_supplicant.conf
Nano is a text editor that you can use in the command line/terminal. If you have another text editor you'd like to use, go for it. Similar to touch, nano requires an argument for the file name. You can also use a file path but by default, it would open a file in the current directory. If the file does not exist, as in this case, it will create a new file. You will notice your terminal has changed. You can only use your keyboard in the terminal so ypu have to navigate the cursor with your keyboard's arrow buttons.

On Windows, open up notepad.
Copy below and paste into nano or notepad, depending on your operating system.
ctrl_interface=DIR=/var/run/wpa_supplicant GROUP=netdev
update_config=1
country=<Insert 2 letter ISO 3166-1 country code here>

network={
 ssid="<Name of your wireless LAN>"
 psk="<Password for your wireless LAN>"
}
Replace the text between, including the < and >. See example below:
ctrl_interface=DIR=/var/run/wpa_supplicant GROUP=netdev
update_config=1
country=CA

network={
ssid="mywifi"
psk="babae123"
}
The country code is important for activating your Wi-Fi on the 5 Ghz spectrum. I know that United States (US), and Canada (CA) both allow for Wi-Fi 5G (not to be confused with the 5th generation technology standard for cellular networks). The country code for Korea is KR. Let me know in the comments if Wi-Fi 5G is working in Korea.
On Linux, in nano, you will see your menu on the bottom. The ^ is your Ctrl key on your keyboard. So press Ctrl + X to exit. Type Y and press enter to confirm the save. Move the file wpa_supplicant.conf to the boot partition, as with the ssh file.

On Windows, save as wpa_supplicant.conf in the boot partition.
Now, eject the microSD card and put it in your Pi. Power on the Pi but attaching the microUSB or Type-C cable. Give it a few minutes to completely boot up. The green LED light on the Pi should indicate how hard it is working. If it is steady on or flashing quickly, it means it's working.
To access the Pi, open up terminal on Linux; on Windows, right-click the start button and click Windows PowerShell.
Enter the command:
ssh pi@raspberrypi
The command "ssh" is to connect to your Pi through the secure shell protocol. "Pi" is the default user name, and the @ symbol signifies where to connect. The default hostname is "raspberrypi" but you can also use the IP. For example,
ssh pi@<Enter the IP of your Pi>
If you have successfully completed the steps above, you will see a prompt for the password. Enter the default password, "raspberry".
If you do not get prompted for the password and instead got "ssh: Could not resolve hostname raspberrypi: Name or service not known", try the following to obtain the IP of your Pi.
In the terminal/PowerShell, enter the command:
ping raspberrypi
Else, try:
ping raspberrypi.local
If your Pi is connected on the network via Wi-Fi, you should see something like:
64 bytes from raspberrypi (192.168.0.10): icmp_seq=2 ttl=64 time=10.6 ms
If the above does not work, then you can login to your router to find its connected devices. As each router has a slightly different login method, you will have to find this on your own.
Lastly, you can try to use an ethernet connection or start over from the begining and see where you could have made a mistake.
Congratulations! You have sucessfully set up the Pi.
Next week, we will secure your Pi by changing the username, password, and hostname.
'Raspberry Pi' 카테고리의 다른 글
| The Raspberry Pi Series: LAMP Server (9) | 2020.10.31 |
|---|---|
| The Raspberry Pi series: PiVPN (2) | 2020.10.09 |
| The Raspberry Pi series: Homebridge 라즈베리파이 시리즈: 홈브리지 (8) | 2020.09.30 |
| The Raspberry Pi series: Securing The Pi / 라즈베리파이 셋업 시리즈: 보안강화 편 (7) | 2020.09.21 |
| The Raspberry Pi series: Pi-hole (11) | 2020.09.07 |